 Window Overview
The Add files interface allows files to be specified that App Wrapper will add to an application during wrapping.
There's several ways to add files to the Add Files interface.
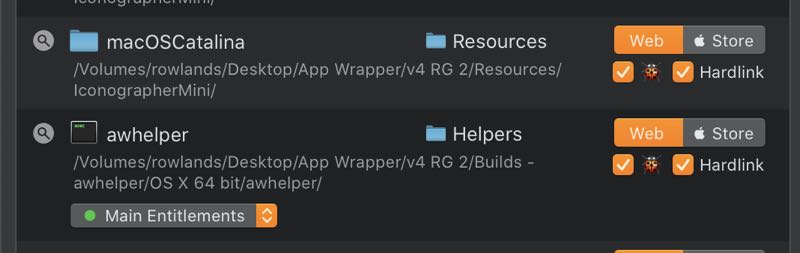
Displayed towards the right of the file/folder in the list. This menu allows the destination of the item to be specified. Mouse over it and it will show as a menu.
On the far right of the list item is a segmented controls that reads "Web" & " Store" select either or both of these to have the item added for that channel.
Under the channel selector is two checkboxes, "🐞" is to include the item when debugging. While "Hardlink" will select if the item is hardlinked into the application or copied for a debug build.
A Hardlink is where a reference to the file data is created at that location, this is much faster than copying the file, but it also means any modifications made to the file inside of the bundle will be reflected on the original as well.
These options only appear for executable items. There are 3 options.
If you wish to remove an item from the Application bundle, please see Modify Files. If you no longer wish for App Wrapper to add specific files or folders to your application, read on. If you'd like to temporarily disable the ability to add a certain item to the application please see the next section.
To stop an item from being added to test something, simply unselect "Web" & " Store" from the channel selector in the top right hand corner of the item in the list.