Home
Guides
Interfaces
Troubleshooting
Add SF Symbols

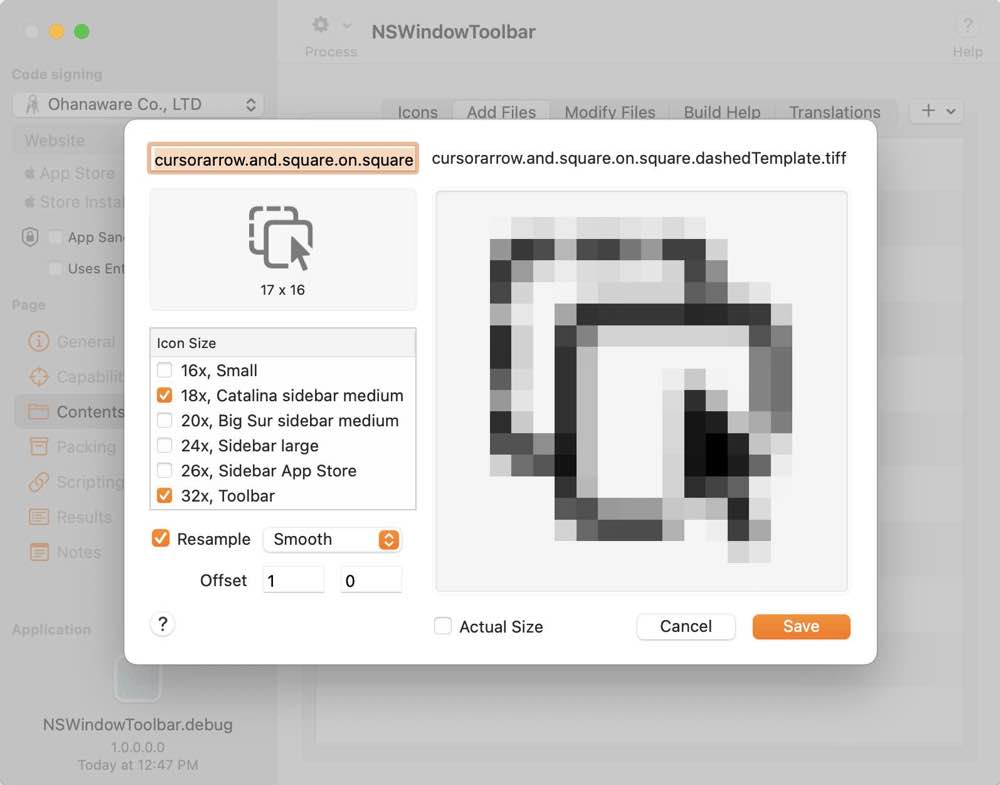
SF Symbol rasterizer can be found by click on "Contents" in the sidebar, then "Add Files" and finally selecting "Add SF Symbol as Image" from the "+" menu next to "Add Files".
- Select a symbol from the "SF Symbols" application
- Press ⌘-shift-C to copy the name of the symbol
- Paste the name into the top left text field.
- Top right displays the file name that will be available in the Resources folder.
- Middle left is the size list, from here choose the sizes it will be displayed at. Retina sizes are automatically added.
- Resample can be used to improve the quality of the rasterized symbol, especially on 72 dpi screens.
- Not all symbols are centrally aligned, use the offset to shift the symbols in the frame.
- Actual size will display the symbol at the smallest size selected in the left hand list.
- Click on "Save" to create the Rasterized symbol, it will be stored in the App Wrapper document and added to the application during wrapping.
Use this guide Integrating with Xojo so that the rasterized symbols are available while debugging.
